
How to Professionally Record a Piano
Learn how to capture album-ready piano sounds for any genre.
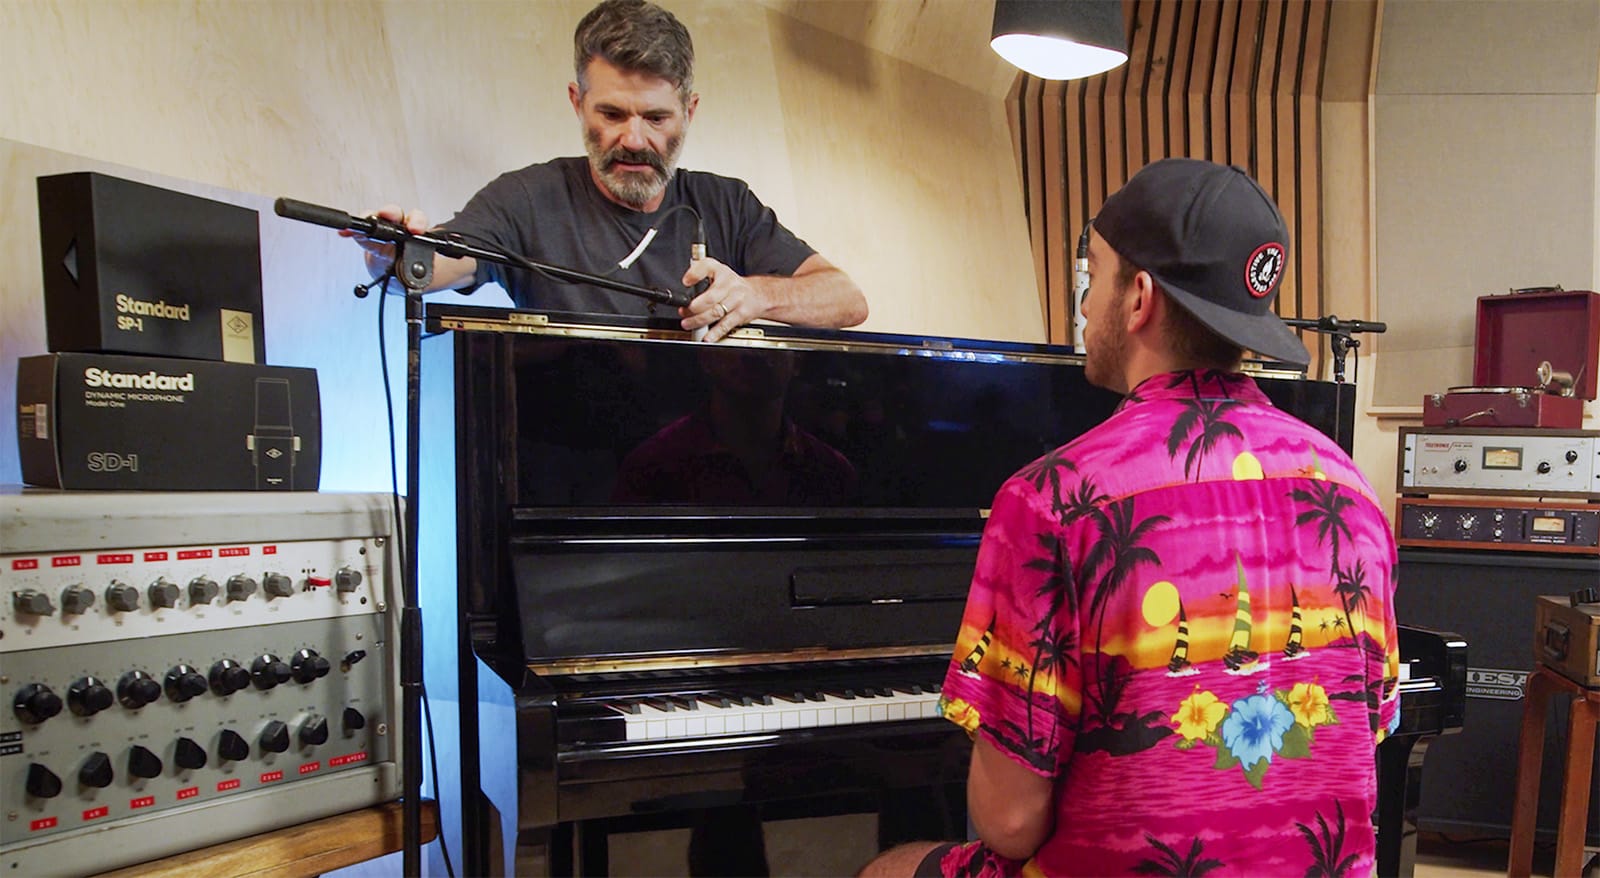
Discover how multi-Grammy-winning producer Jacquire King (Kings of Leon, Tom Waits) captures clear and rich upright piano sounds using condenser and dynamic microphones in three simple setups at Studio 610 at UA Headquarters in Santa Cruz, California.
Place Mics Inside the Piano for Isolation
When recording multiple musicians in the same room and mic bleed is a concern, King will often place a stereo pair of small-diaphragm condenser mics — UA SP-1 modeling mics — inside the piano with the front panel attached for extra isolation.
Small-diaphragm condensers are neutral sounding, so they’re great at recording sources like piano without too much extra coloration. Plus, a stereo pair gives you more control over how "wide" the piano sounds in your mix.
After adjusting the mics, make sure you listen back in the control room.
Pay Attention to Where the Piano is Being Played
Here, King explains why he pays attention to the range of notes being played in the song, and then places the mics accordingly. This gives you a balanced sound and stereo image.
For example, if the song is mostly played on the middle octaves of the piano, the mics may be placed closer to the center. Conversely, if the song uses a wide range of high and low notes, the mics might be placed farther out to the sides.
After setting input gain and taming the transients using the Teletronix LA-2A compressor plug-in, King does a quick test recording so he can listen back to check the tone and stereo image without also hearing the piano live in the room.
This is essential if you’re working in a single space without a dedicated control room. Don’t be afraid to repeat this process as many times as necessary, listening back and making adjustments until everything sounds just right.
Remember, it's better to fix the sound at the source than to leave it for the mix!
Remove the Piano's Front Panel for a More Open Sound
Placing the mics inside the piano is great for isolation, but when possible, King prefers to remove the piano’s front panel, which has a few advantages:
- It allows the mics to be pointed directly at the soundboard where most of the piano’s tone comes from.
- It lets the tone from the soundboard develop, giving you a more natural, open sound.
- You can place the mics closer to the edges of the piano without worrying about unwanted build up of low and midrange frequencies.
After double checking his input gain and compression settings — an important step whenever changing your mic configuration — King is ready to record another take.

Adjust the stereo mics depending on where the parts are played on the piano.
Adding a Dynamic Mic for Extra Color
Learn how King builds on the previous setup by adding a dynamic microphone behind the piano — in this case the UA SD-1 modeling mic — that he can use to add extra color and "guts" to the sound with some creative processing.
- The mic is placed about 2' off the ground and pointed directly at the back of the soundboard in the center of the piano.
- The small-diaphragm condenser mics are left in the same position, and the third mic is blended into their sound.
- Due to the nature of the dynamic mic’s design and because the sound is quieter behind the piano, King needs to add more preamp gain. Then, he adds an 1176 Rev E compressor for some extra volume, color, and control.

Placing a dynamic mic outside the soundboard adds interest and texture to the piano tone.
Adding a Mic? Check the Phase
Whenever more mics are added, it’s important to check the phase of the new mics against the existing mics to make sure you aren’t getting any phase cancellation, which can cause recordings to sound thin and hollow.
Here, the dynamic mic is picking up the sound of the piano from the opposite side as the condenser mics, so King simply engages the polarity invert button on the dynamic mic’s input channel to keep it in phase with the other mics.
After recording another take to make sure he’s happy with the blend of the three mics, King experiments with adding some distortion and delay to the dynamic mic with the Raw Distortion and Galaxy Tape Echo plug-ins.
The distortion adds harmonics that help the piano cut through a mix and translate better on smaller speakers, while the delay creates space around the piano that adds vibe and interest.
Let's Get Tracking!
From clean to funky and colorful, now you're ready to capture amazing piano sounds using these tried-and-true miking recipes.
-

-
-
On Sale
Teletronix® LA-2A Leveler Collection
Add to CartRegular Price: $299.00
$149.00
You'll Save 50%
-
-
On SaleUnison
Distortion Essentials Bundle
Add to CartRegular Price: $149.00
$119.00
You'll Save 20%
Read More

Choosing the Right Mic: Dynamic vs. Condenser Evaluated
Explore the differences between dynamic and condenser microphones in our comprehensive guide. Discover their distinct characteristics, applications, and find out which one suits your recording and live needs best.

Are Modeling Mics Good?
Dive into the world of modeling microphones and discover how Hemisphere modeling technology unlocks the sound of the world's greatest microphones.

How to Professionally Mic Drums
A step-by-step guide on how to mic a drum set for professional album results. Learn the secrets of multi-Grammy-winning producer Jacquire King (Kings of Leon, Tom Waits) as he records Robot Monster at UA Headquarters in Santa Cruz, California.